PstViewer Pro is a Windows software application that lets you do lots of useful things with email. One of the great features of PstViewer Pro is that you can build your own “Export Profiles” to quickly do repetitive tasks, such as converting email to a specific format and then copying the files to a specific folder. There are many ways to build custom export profiles.
PstViewer Pro comes with a large set of pre-built export profiles. You can find them by going to the Export tab and clicking the dropdown list. This is where you can select a from among the many export profiles already built for you.
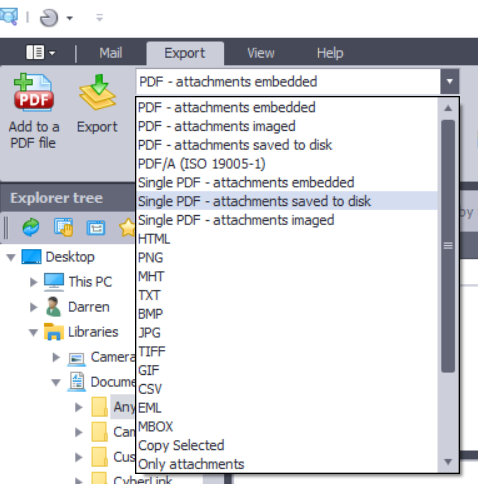
Make Your Own Email Export Profile
You are not limited by our default export profiles. It is easy to design your own! Here’s how.
First, click the “New Profile” button. That will launch the Profile Builder Wizard. Now you just follow the prompts and make the selections that are right for your project.
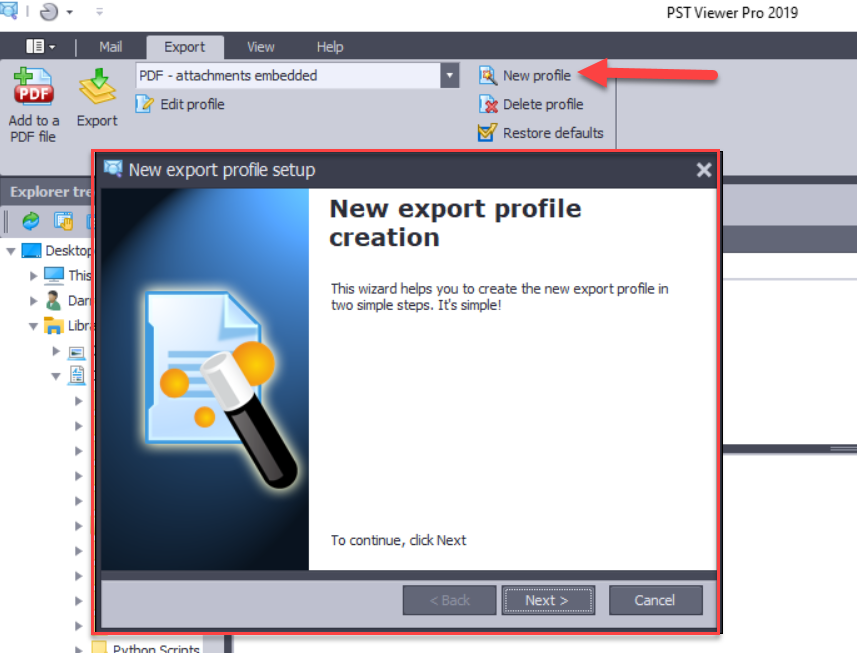
Click “Next” to continue creating a new export profile.
“Step 1” is where you can give your profile a meaningful name. In this example, I will call it “Export to DOCx.” The name you enter here will appear in the drop down list. Make it short but meaningful.
In the area called “Select export file format,” choose the file format you want to convert email to. There are many options to choose from, including PDF, HTML, DOCx and more. In my example, I will choose “DOCx.”
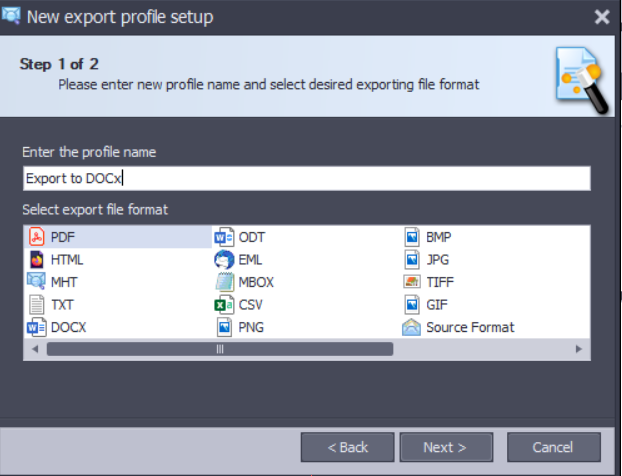
Click Next to advance through the wizard.
Step 2 asks you to define where and how to save the exported files. You can choose any Windows folder on your computer. You can also tell PstViewer Pro whether it should compress the exported documents using Zip file compression. Zip is a great option to save disk space, especially if you are exporting email to HTML or Text.
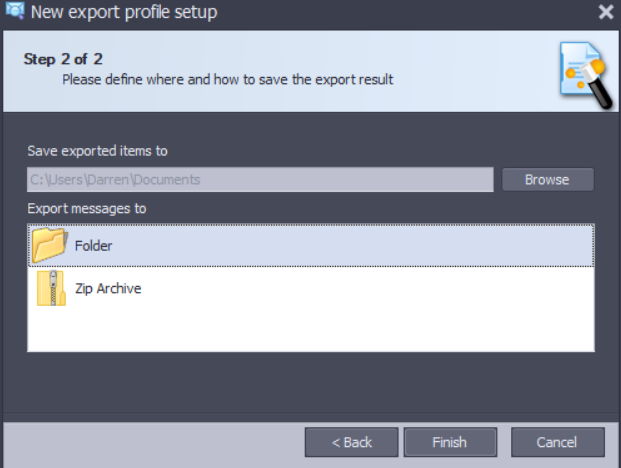
Click “Finish” and your Email export profile is saved. You can now choose it from the drop down list. To use your export profile, first choose an email (or emails) you want to convert. Highlight them in the mail list, then select your export profile, and begin the export.
Add more customization to your email export profile
Now that you have created a basic export profile, let me show you where you can make even more changes.
Choose your new profile from the drop down list. Now, click the “Edit Profile button to bring up the Edit Profile page.

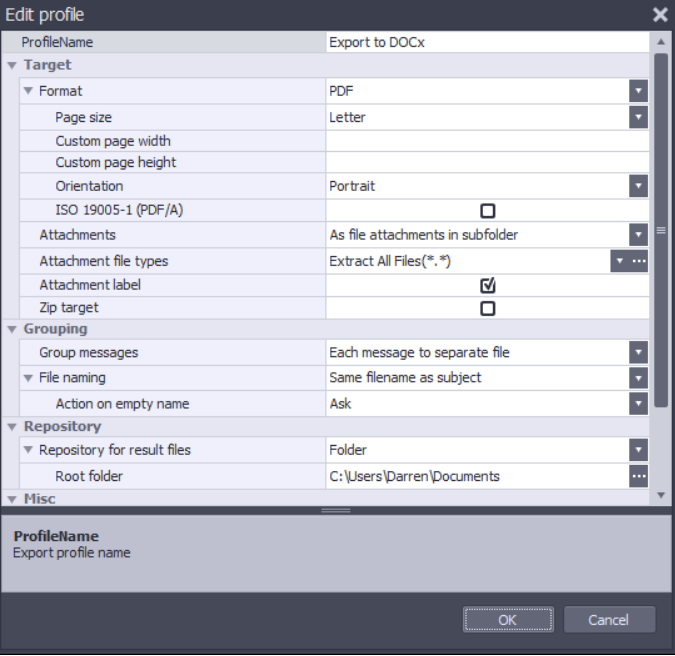
PstViewer Pro gives you a lot of options. I suggest you use your sample export profile to experiment with the different options available to you.
You can page file types, page orientation, the way PstViewer Pro names the exported files, and so much more. Go ahead and experiment with the options! You won’t break anything.
Thanks for following along. We hope this gives you an idea of how to tap into PstViewer Pro’s email export functions. With a little effort, you can create custom export profiles that will save you a lot of time as you work with email.
Post your questions below, or contact us using the Live Chat on this page!
